In which the artist ponders the nature of imperfection
Oh my dears, it’s been a staggeringly disorganised April.
Nothing too dreadful, but between chicken pox and a long-awaited holiday I didn’t get much of anything on my list finished.
We did have a perfectly spiffing time learning about dinosaurs (oh so many dinosaurs), hiding the afikomen (I was so successful that I just received an email from my dad asking where it was because he was worried about ants finding it before he did) and getting out of Dragon’s way so he and his grandparents could have popcorn parties (the fact that we happened to go to the cinema and ballet was entirely by the by, you understand) but my best laid plans of scheduling all my blog posts before I left didn’t really pan out.
So here’s the final installment of the Humade New Kintsugi Repair Kit experiment as well as a hope that May will be more organised. There’s an introduction to the concepts of kintsugi and wabi sabi here, and you can buy a kit of your own from Humade here.
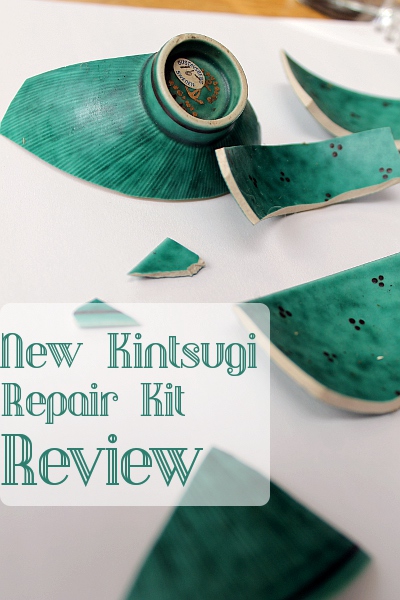
Humade New Kintsugi Repair Kit Review

I like to consider myself good at directions – I read them, I absorb them and I sometimes choose to ignore them but I prefer to do so on an informed basis.
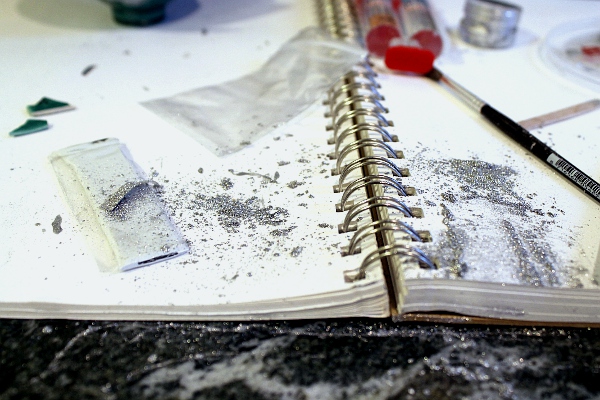
There were two sides of the instruction manual which came with the kit, one side were the technical specifications of the various glues and epoxies and the other was an illustrated guide to the process.
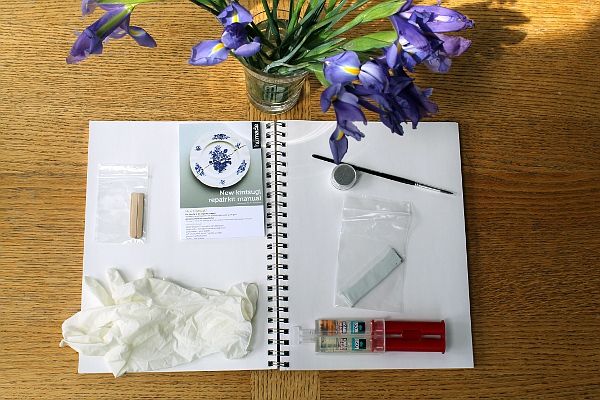
I skimmed the technical sides, mainly for information about clean up and safety warnings. Then I got my pot shards out and, with the illustrated side out for reference, I began.

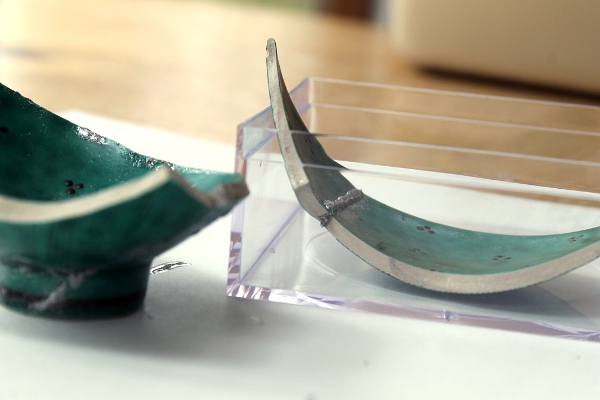
For a while it all seemed to be going very well, I got a few large pieces together and I was just waiting for the ‘few minutes’ it took for them to set before I was going to get started on the next pieces. There was even time for the Lovely Young Man and sometime photographic assistant to take some photos of me at work.
Then it fell apart – rather literally. On further examination of the difficulties, it appears that by ‘a few minutes’ (lovely illustrated instructions) they meant ’20 minutes. Curing time 1 hour’ (technical specifications). Deep breath, change of plan from an afternoon’s diversion to a half an hour every day until it was finished or I threw it across the room.
Another of the directions that gave me problems turned out to be the very first one where it said to ‘add a tiny hint of goldpowder and mix well.’ Those of you with a scientific bent will appreciate that a hint is not an easily defined measurement, nor do the directions tell you why it is only to be a hint. I had considered several reasons – economic, ease of clean up, ensuring that the powder lasted the same length of time as the tube of epoxy and probably a few more. What I hadn’t considered was that the powder keeps the glue from setting, allowing your pieces to break apart after 25 minutes of patient holding.
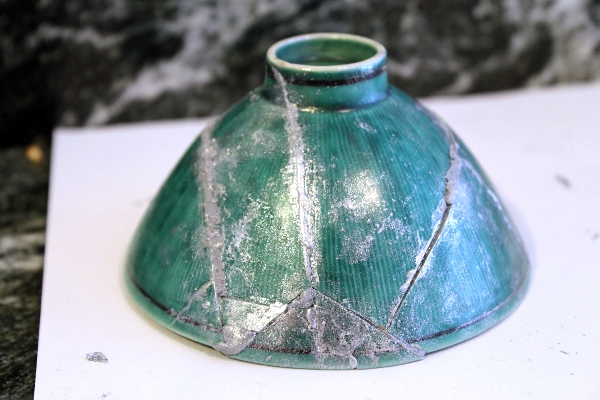
By now, there was pretty much nothing left that could go wrong… well, except for the vial that contained the steel powder cross-threading every time you closed it, so that when you opened it again, large quantities of minute steel dust covered everything within a 100 metre radius, any excess drips of epoxy tended to remove the glaze on the pot when removed and that the imperfect elements of kintsugi were vastly outnumbering the beautiful and I was starting to wonder why we hadn’t just superglued it together in the first place.
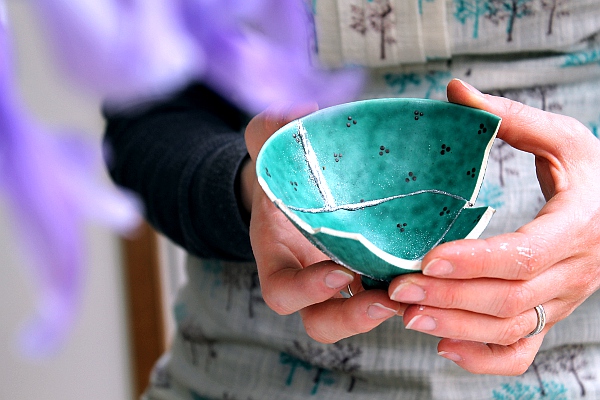
In the end, I don’t really know how I feel about the whole experience. I’m really disappointed in the process (and I’m a process artist so that really matters to me), I wish I’d practiced on something less precious before I started and since I haven’t had a chance to spend any time with the finished piece (flights to be caught and all that) I’m swinging wildly between operator error and the instructions and materials being the main point of failure.
There’s a lesson in that somewhere about how life isn’t required to provide complete resolutions, but I’m not sure I’m ready to absorb it yet.
16 November, 2014 — 8:53 pm
Hi Katy,
Many thanks to share your experience with other people. I am extremely annoyed with repair kit, and forgive me for saying this, but…New Kintsugi, gold repair by Humade, is a shit. In spite of everything, keep on smiling.
best
Luna
16 November, 2014 — 9:20 pm
I went back and looked up the original kintsugi technique and it’s not simple! I wonder if it’s a skill that is beyond the reach of the amateur ceramic repair person?
20 November, 2014 — 7:27 pm
Hi there,
I wanted to get in touch as I too have tried the Kintsugi repair method. We bought a few kits for our on-line store so thought we’d test it out. After the initial fiddle, fighting to get the two pieces to join and stay joined I found myself addicted, so much so that I went and bought a load of damaged old china from the local antiques store! You are totally right in saying that it takes more than a simple few minutes for the pieces to stick to each other and stay stuck. I found that it worked better if I left the glue to go off for about 4 minutes before joining the bits together, but then it was still a case of sitting patiently, holding the pieces together for about ten minutes (my partner had the task of feeding me my wine as I hadn’t a hand spare!) I also got impatient at the beginning and brushed the bit of gold dust on too soon, causing the resin to spread. I got in a bit of a mess. This is where I could help with your dear little pot above. I found that cotton wool (I used a cotton wool bud for careful work) dipped in nail polish remover worked a treat for getting rid of the excess, messy, smudged glue and gold and I also found that even though the join on my first attempt didn’t look wonderful, I could go over the top of it again but dribbling a line of the resin over the top, this time waiting just before it set before applying the gold dust. The end results were fabulous. I even cheated by using this dribbling technique on unbroken plates to get the same effect. I’m trying to say that if you need any advice (If I haven’t made any sense above) to fix your lovely little pot, then I’m happy to help. Click here to see my results. http://www.unicheinteriorfurnishings.co.uk/kintsugi-kit-839-p.asp Good Luck 🙂
21 November, 2014 — 11:18 am
Oh wow, so much useful advice (especially about the wine)!
Next time I’m at my mum’s I’ll have to see if I can tidy up the smudgy bits, and I’ll post some updates.
17 December, 2015 — 9:58 am
Oh, how very disappointing, Katy! One observation: isn’t there an old restorer’s technique of using a deep tray of sand to support your pot while the glue dries…? I say this without having tried it personally, so the unfortunate reality might be that you’d just end up with sand debris glued to your pot shards, adding insult to injury. And that’s rather a lot of sand and space to invest in for the odd bowl too. Anyway, I’m going to try the (non-kit) method outlined by ceramicist Carys in the comments on my recent kintsugi blog post – here it is, in case anyone landing here in similar difficulty is interested: http://scrapiana.com/2015/12/02/kintsugi-at-the-pitt-rivers-museum/ So, what happened to your pot in the end? Did you break it into shards again…?
18 December, 2015 — 10:23 am
Ooh, the idea of adding sand to the mix makes my blood run cold! I tried propping it up in a box, but it still oozed apart.
I’ve written an update post, but I’m hoping not to have to revisit it in the near future (I’d rather buy a china cabinet)!
22 October, 2016 — 6:21 pm
This product is an expensive collection of easily obtainable elements with suspect instructions for use. You’ll be better off going to a local art store and getting some gold/silver leaf/dust, epoxy, and a brush for about 1/4 the cost and figuring it out.
26 August, 2020 — 11:35 pm
The process is a simple education in patience. So I switched to JB Weld clear. Now I have cool stuff that doesn’t take 6 mos. to build and it dishwasher safe.